Monday, October 17, 2016

Adding the Transom

 Remember when we built the transom way back?  Time to add it to the boat. Here it is all put together, covered in fiberglass and epoxy:

Some last minute sanding touch-ups:

Putting it on the back of the boat:

 Adjusting the fit- He is using a pencil to scribe the edge:


 Making the necessary adjustments to match the scribe:

 Transom is on, next up it is time to fit the sides.

Wednesday, September 21, 2016

Boat Stand and Moving Downstairs

Chris has a great shop to work in, but once the sides are on it, the boat will no longer be able to fit through the double door. The solution is to move the project downstairs to the garage. 

To get the garage ready, Chris builds a stand to put the boat on when it gets there.

Remember the shelves and the bowstem Chris built way back at the beginning of the project?  He secures them to the stand so they are ready for the bottom of the boat. 


Once again, we round up a posse of friends to help us move the boat. We need to flip it, bring it out the door, secure it to a trailer, drive it down to the garage, carry it in, and lift it onto the stand.  Quite a production.


We have some very good friends. Thanks for your help everybody! 


Next up, we will add the transom and measure the sides.

Sunday, September 18, 2016

Let's Talk About Epoxy

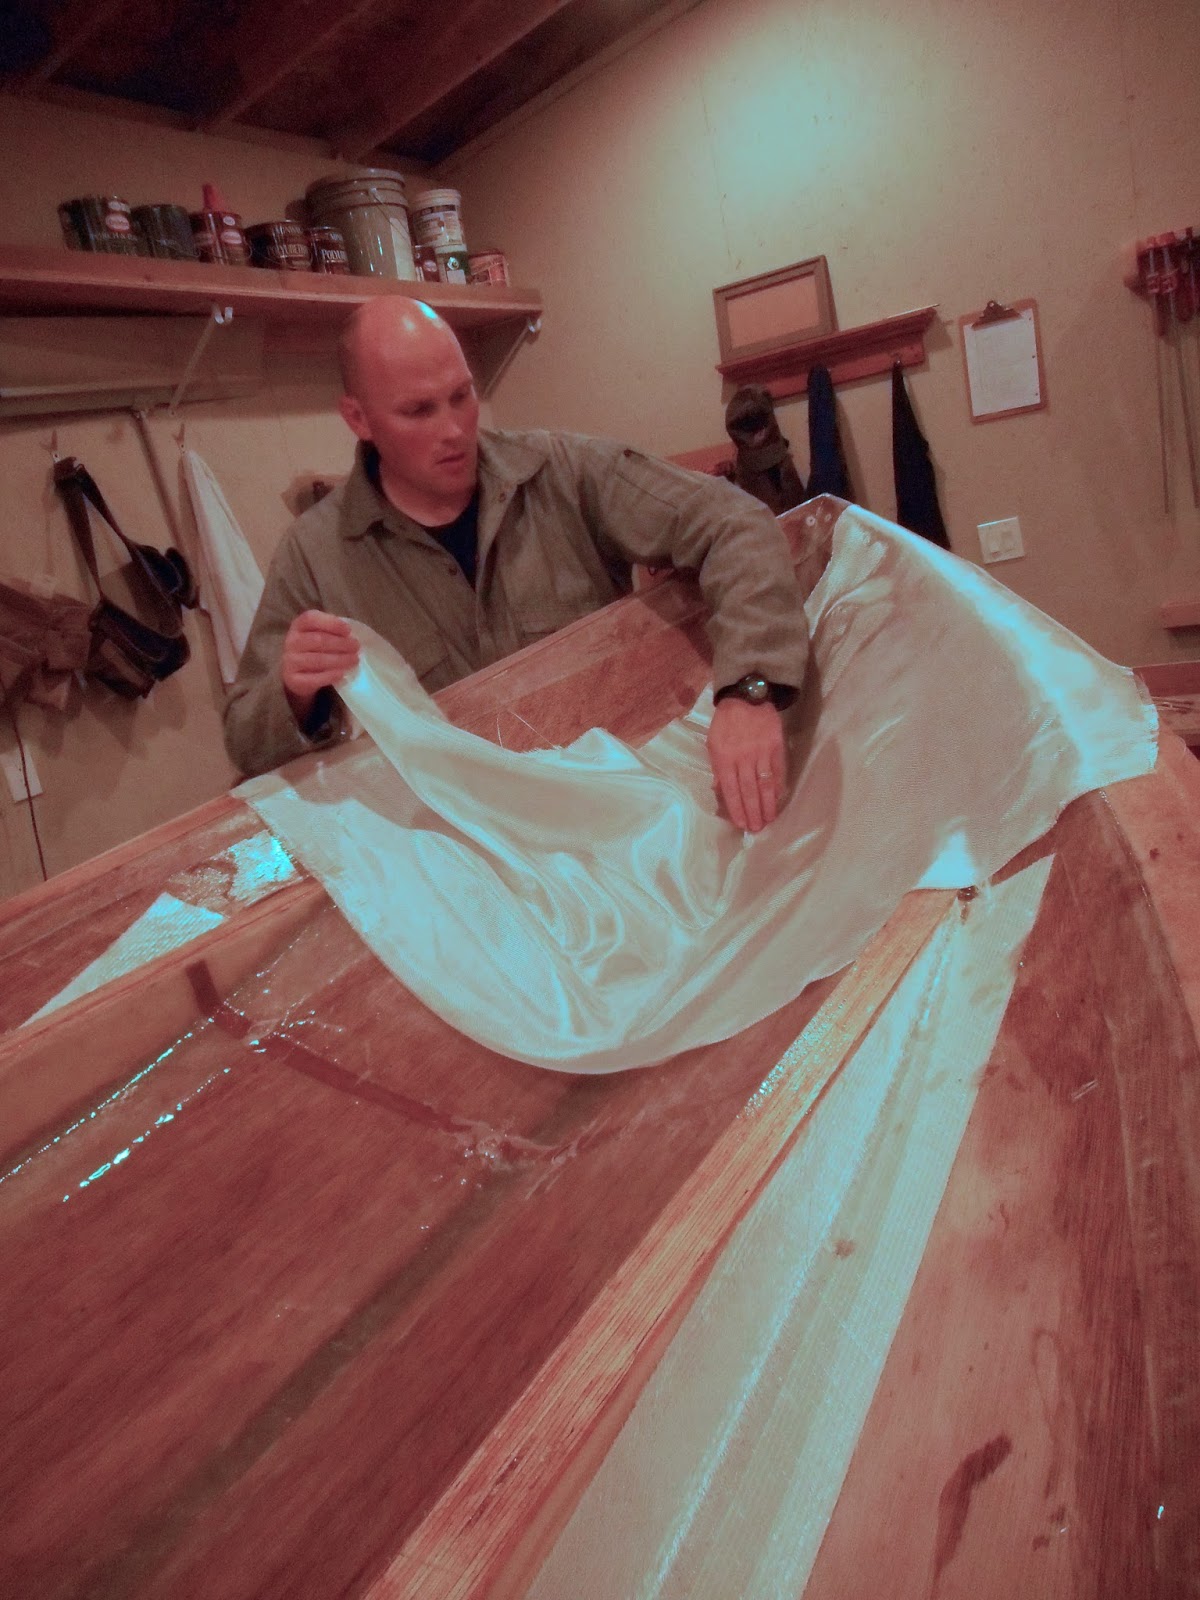
Chris is using a 2 part epoxy system.  It will form a very strong physical bond to the wood and the fiberglass on the boat, and make everything completely waterproof. It will also form an even stronger chemical bond to itself if done quickly enough.  Once it is mixed together, the hardening time varies based on the temperature, but on average Chris has about 20ish minutes to use what he mixes up, so he just does a bit at a time.

The epoxy system is made of a resin and hardener to be mixed 2:1. It comes in 5 gallon buckets.
 

Pouring small quantities of viscous liquid out of 5 gallon buckets can get tedious. Chris got some very fancy containers to fill up and do most of his pouring from. Yes, that is a laundry detergent bottle and a fabric softener bottle.  I washed them out very well and they work great.

Other ingredients are added to thicken the mix based on what he is using it for. These include cabosil and wood flour.


There's no fumes to worry about, but this stuff makes a mess and once it dries on something it stays on. Great for the boat, not great for clothing and skin. Chris has some work coveralls dedicated to boat work for this reason.  

In summer and fall temperatures, this stuff is usually dry and ready to be sanded by the next day.  When Chris was using it on his last boat in the cold winter temperatures, it could take a few days before it was ready.


Friday, September 2, 2016

Bottom Fiberglass and Epoxy

Time to turn the boat over. Now that the stringers are attached, it is too heavy for Chris and I to handle alone so we rounded up a posse. Thanks for your help, guys!


Now to epoxy the stringers.  Here, Chris is adding a bead of thickened epoxy to the joint. 

Chris puts additives into the epoxy to thicken it depending on what he's using it for.

Very heavy duty and thick fiberglass is added so that joint is very strong. 


 And then on the whole bottom of the boat.

 Here, he is putting down a fiberglass sheet he will epoxy on.  Whenever he epoxies the fiberglass, he needs to smooth it out so there are no air bubbles to weaken it.


Coming along!

Bow Curve Thickness

The overall plywood thickness on this boat is 1/2 inch. That, plus the fiberglass and epoxy that will be on there, makes it plenty strong.  The problem is that 1/2 inch plywood doesn't bend well enough to make the front curve.  So the plans call for, way back when Chris scarfed the plywood together, a 1/4 inch sheet of plywood scarfed onto the 1/2 inch plywood.  That thinner part is more bendable and makes up the front bottom curve.  But it still needs to be 1/2 inch to be strong enough, so in this step Chris added another piece of 1/4 inch plywood onto the front part of the boat.

Here it is, flipped over. You can see the stringers underneath it that are about to be attached.

 Here it is from the underside in case you're curious.

Chris fit the 1/4 inch pieces that will be added.


Then he pulled the fitted pieces off and coated them with epoxy.

Very carefully, he added one side at a time to the bow and used screws to hold it tight. He scarfed the end to the 1/2 inch piece on an angle.  The squares are wooden washers.


When the epoxy has cured, he unscrewed the washers. It is hard to see, but there are screw holes all over. 


He filled the holes in with the epoxy. Then, as long as he had it flipped over, he added fiberglass to the bottom ridge and sides and attached the stringers. This is not the time when the plans call for the stringers to be attached, but this worked out well for Chris.


There we go, the whole bottom of the boat is now made up of 1/2 inch plywood. Next up: lots more fiberglass!